I made this Hydrangea cupcake bouquet a couple of years ago to give as a gift to a friend for her birthday. I've been asked about how it's made many times and have finally gotten around to posting this tutorial. It's fairly simple to do but very impressive when finished.
To make one small cupcake bouquet, you will need:
4-6 vanilla cupcakes
1 recipe (2-3 cups) buttercream frosting (you can use any type buttercream frosting you prefer. I used this recipe)
Violet or purple food coloring. The gel type icing coloring works best.
Pastry bag fitted with a large star tip.
Container for your bouquet
Floral oasis or foam cut to fit the into your container
toothpicks
5-10 pieces of tissue paper cut into 4-5 inch squares
Add the violet food coloring to the buttercream but don't blend it in completely. Let some of the icing be darker and even leave some white bits. This will make your hydrangeas look variegated and more realistic.
I used the Wilton 1M star tip. This is my go to decorating tip. I use it all the time!
Fill your pastry bag with the violet frosting and pipe stars all over the top of the cupcake. Pipe the stars very close together so that you cover the entire top of the cupcake.
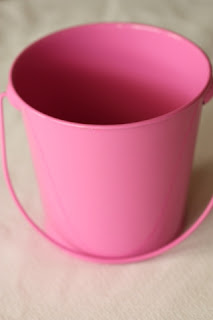
I found these cute metal buckets for $1.00 at Target ! Small terracotta pots or any small flower pots work well too. Cut your floral foam to fit into your container. If you have a wide topped pot/container you may have to extra pieces to fit down into the sides. It doesn't have to fit perfectly, just make sure you have enough oasis to support your cupcakes.
Poke 2-3 toothpicks into the bottoms of you cupcakes. Two toothpicks usually does the job, but occasionally I need three to keep the cupcake in place.
Stick the tooth-picked cupcakes into the oasis in your container. Place the cupcakes as close together as possible. Fitting as many as possible around the top of the container. this will vary on the size of your cupcakes and the container you choose. I could fit 4 cupcakes on this bouquet. Don't worry that there are gaps where you can see the oasis. You will be hiding these with the tissue paper.
Grasp the tissue paper in the center of each square and twist. This will form your tissue paper "leaves". Going around the bouquet add the pieces of tissue paper anywhere you have a gap. I stick the pieces all around the edges and usually one on top. If you have a piece that won't stay in place you can secure it with a toothpick.
Voila, an edible bouquet, a great gift for almost anyone!


