

Wednesday, October 31, 2012
Tuesday, October 23, 2012
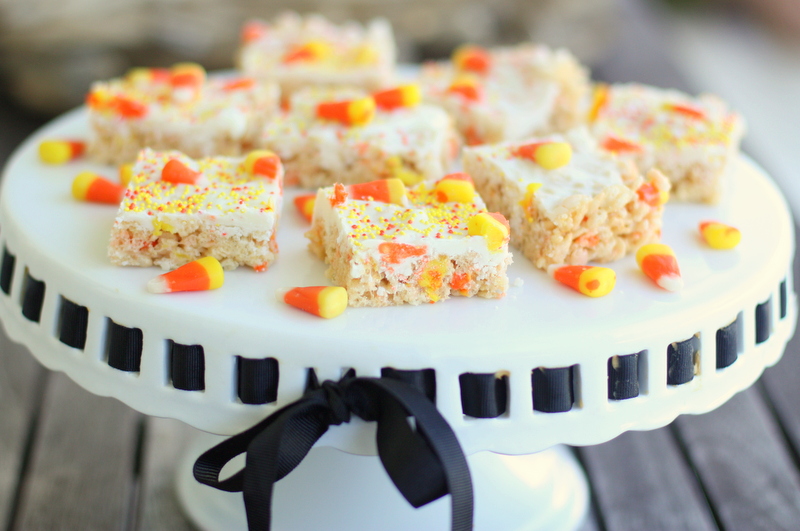
Candy Corn Rice Crispy Treats

Where has this month gone! With just a little over a week until Halloween,I thought I'd share this idea for candy corn rice crispy treats. These festive treats are perfect for Halloween parties, bake sales, etc... To make them extra special, I topped the rice crispy treats with white chocolate and added some orange and yellow sprinkles and candy corn. Super cuteness! And they taste great too.
INGREDIENTS:
4 tablespoons butter
1 (10 ounce) bag marshmallows
1/4 teaspoon salt
1 teaspoon vanilla
6 cups Crispy Rice Cereal
1 cup rough chopped candy corns
1 bag white chocolate candy melts (12 ounces)
1 (10 ounce) bag marshmallows
1/4 teaspoon salt
1 teaspoon vanilla
6 cups Crispy Rice Cereal
1 cup rough chopped candy corns
1 bag white chocolate candy melts (12 ounces)
METHOD:
Spray a 13x9 baking dish and rubber spatula with non stick spray. Place white chocolate candy melts in a bowl. Follow the manufactures instructions for melting the white chocolate. Set aside and make the rice crispy treats.
In a medium sized sauce pan over low heat, add butter and let it melt. Once melted add marshmallows, salt, and vanilla. Stir until the marshmallows have melted completely and have reached a smooth consistency. Remove from heat and fold in the cereal and candy corns until completely coated. Add the mixture to the greased baking dish and smooth out evenly.
Spoon the melted white chocolate onto the rice crispy treats. Using the back of a spoon or an off-set spatula, spread the melted white chocolate evenly over the top of the rice crispy treats. Immediately add sprinkles and decorate the top with whole candy corns, if desired.. Allow to cool before cutting into squares.
 |
| What is it about candy corn that makes them just so darn cute? |
More great ideas for Halloween/Fall parties:
Candy Corn Sugar Cookies
Saltine Toffee Bars
Halloween Pumpkin Pancakes with Black Cinnamon Syrup -Tidy Mom
Witches Brooms -Betty Crocker
Nutter Butter Ghosts
Halloween Pretzel Rods
Candy Corn Sugar Cookies
Saltine Toffee Bars
Halloween Pumpkin Pancakes with Black Cinnamon Syrup -Tidy Mom
Witches Brooms -Betty Crocker
Nutter Butter Ghosts
Halloween Pretzel Rods
Monday, October 8, 2012
Give a dog a pumpkin bone

About a week ago I saw these dog biscuits on Pinterest. The recipe was developed by Marilyn at Simmer Till Done. She made them for her dog that was having stomach problems because her vet told her pumpkin could help calm a dog's stomach when they've eaten something they shouldn't have eaten. Good to know. Maisy's been know to eat some pretty weird and disgusting things...but this is a food blog so I'll just leave that to your imagination!
I read through the recipe and saw that it was also wheat-free so Maisy could have these treats. I made them for her today. There was a lot of tail wagging going on while she ate the first one so I think she approves.
 |
| Maisy, a couple of days after we brought her home seven years ago. I should have known then that she liked pumpkin! |
Pumpkin Dog Biscuit
Source: Simmer Till Done
2 eggs1/2 cup canned pumpkin
2 tablespoons dry milk
1/4 teaspoon sea salt
2 1/2 cups brown rice flour
Preheat oven to 350.
In large bowl, whisk together eggs and pumpkin to smooth. Stir in dry milk, and sea salt. Add brown rice flour gradually, to form a stiff, dry dough. Turn out onto surface lightly dusted with some of the brown rice flour. If dough is a little crumbly, knead it a bit, pressing the crumbly pieces in to combine.
Roll dough the dough to 1/2" thickness Using a cookie cutter or biscuit cutter, cut out the dough. Re-rolling the scraps as needed. Place the cut out dough on cookie sheet lined with parchment or a silpat. Poke the tines of a fork in the center of each biscuits before baking, lightly pressing down about halfway through dough. Bake for 20 minutes. Remove from oven and carefully turn each biscuits and bake for an additional 20 minutes. Allow to cool completely on rack.
 |
| Who wants a treat! |
 |
| I'm such a good dog! |
 |
| Please give a dog a bone! Do I have to beg??! |
 |
| Mom also got me a new toy today. |
 |
| because all of my other toys look like this. I'm not very nice to my toys. |
 |
| If you give me another one of those treats I promise to be nice to this toy...for a while. |
Tuesday, October 2, 2012
Pumpkin Cheesecake Muffins

If you've been a reader of this blog for any amount of time than you are already aware of my slight pumpkin obsession. I can't resist a pumpkin based baked good. I've blogged about everything from my favorite pumpkin pie to pumpkin biscotti and pumpkin latte's. So it's Fall again and my obsession is back in full swing!
A pumpkin roll (pumpkin sponge cake filled with a cream cheese filling) is one of my favorite Fall desserts. (I can't believe I haven't posted a recipe...soon!) These muffins have all the same components as a pumpkin roll, spicy pumpkin cake with a cream cheese swirl, baked up in muffin form. Plus because it's a muffin it's now okay to eat pumpkin roll it for breakfast, right?

Pumpkin Cheesecake Muffins
Yield: 1 doz. regular sized muffins or 2 doz. mini muffins
PRINTABLE RECIPE
MUFFINS:
1 15 oz can pumpkin puree, not pumpkin pie filling
1/4 cup coconut oil or any vegetable oil
2 large eggs
1 cup sugar
1 teaspoon vanilla
1 1/2 cups all-purpose flour
1 teaspoon baking powder
1/2 teaspoon baking soda
1/2 teaspoon ground cinnamon
2 teaspoons pumpkin pie spice
1/2 teaspoon salt
FILLING:
8 ounces cream cheese, at room temperature
1 large egg yolk
1/2 cup sugar
1/8 teaspoon vanilla extract
METHOD:
Preheat oven to 350°
In a large mixing bowl, combine canned pumpkin, oil, and sugar together.
Add in eggs, one at a time, mixing well after each one.
Stir in vanilla.
Stir the flour mixture to liquids, combining thoroughly and scraping the sides of the bowl with a spatula until well combined.
Spray your muffin pan well with cooking spray. Fill each muffin about 2/3 full. Divide the filling evenly placing a large dollop on each muffin.
With a skewer or a knife, swirl the cream cheese mixture into the the pumpkin.
Bake for 20-25 minutes for regular muffins or about 18 minutes for mini muffins. The muffins are done when a toothpick inserted in the center comes out clean. Allow to cool for 5 minutes and remove from the pan.
*NOTES: If you want you could top the muffins with chopped pecans or walnuts.

I made half the batch in regular-size and half mini-sized. The mini muffins are very popable!

Links:
Subscribe to:
Posts (Atom)