


Here's what you'll need for a 6" cake:
1 half ball cake* any flavor (red velvet ala Steel Magnolias, anyone!!)
buttercream frosting, homemade or store bought, I used around 6 cups total
food coloring, red, orange, yellow, and brown
4 piping bags fitted with just the coupler (the inside plastic piece that the tip goes on) or zip top plastic baggies with a small piece, (1/4 inch) cut from one corner
Wilton googly eyes, optional
candy corn for the beak
For my cake, I used one side of the Wilton small ball cake pan. If you don't have this pan don't worry, you can bake your cake in an oven safe glass or stainless steel bowl. Not all glass is oven safe! If using glass, be sure it is a tempered glass that is oven safe. Brands such as Pyrex or Duralex are oven safe and I bake cakes in them all the time!

What size you use is up to you, my cake was 6", that's about the same size as my smallest Pyrex bowl (4 cup capacity) Fill the pan or bowl 2/3 - 3/4 full and bake as you would any other cake. The cake is done whena toothpick comes out clean when inserted in the center. Cool cake completely.
When the cake is cool trim the top flat. This will be the bottom of the cake and needs to rest flat on the cake board or plate.
 |
| I won't tell anyone if you eat the scraps! |
Now the fun part:
Divide your white frosting into four bowls. I made about 2 cups of brown and 1 cup each of the remaining colors. Tint the white frosting with food coloring or gel until the desired shade is reach. Fill your zip top baggies, or pastry bags fitted with couplers with the tinted frosting.
Cover the entire cake with a thin layer of brown frosting. This is called crumb coating. It does not need to be thick but it is necessary so that the dots for the "feathers" on the cake can adhere to the cake.
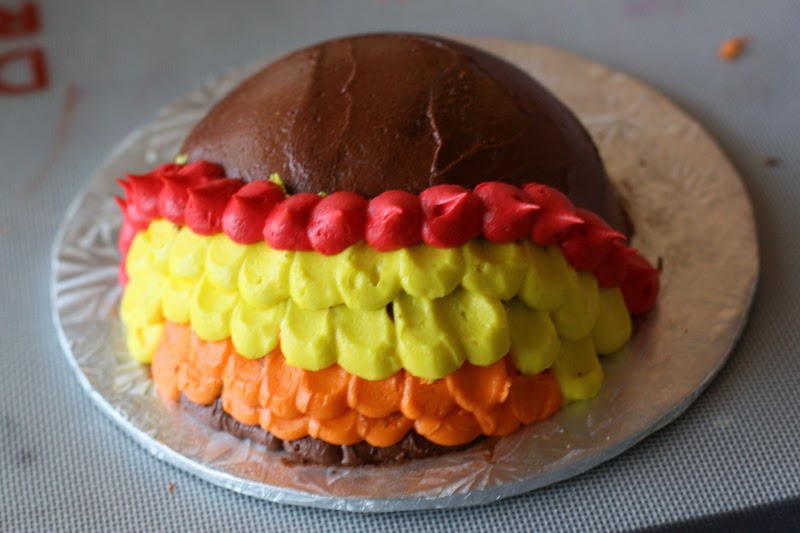
Starting from what will be the back of the turkey, begin pipping your first row of dots along the bottom, flattening the dots as you go, like this:


 |
| It looks a little messy at first |
 |
| You may need to add on dot and flatten it so that your line meets up for the next row across. |
 |
| Like this |
 |
| Then proceed around the rest of the cake |

This is the front of the cake completely covered with the "feathers". The head was a little tricky. I made a couple attempts that I didn't like and finally decided to make the outline of an 8 with the frosting that I filled in to make it stand out a little. I pulled the frosting up and out from the top to make a head.
 |
| For the head I did an outline in the shape of an 8. Then I filled in the shape with more frosting, pulling the piping bag slightly away from the cake to form a cone shape where I put the beak. |
 |
| I feel like those googly eyes are following me! |
This Post is linked to:
Tidy Mom I'm Lovin It!


You are one skilled turkey cake maker, looks amazing!
ReplyDeletea lot of time, effort, and care went into making this, and it's fantastic--my kind of turkey, for sure!
ReplyDeleteI am loving this Turkey Cake! You are so talented. Thanks for linking up to Tickled Pink Times Two xoxoxo
ReplyDelete