Showing posts with label Christmas cookies. Show all posts

Friday, December 13, 2013

Fudgy Chocolate Peppermint Crunch Chip Cookies

This is a rich chocolate cookie that has a wonderful fudge like texture inside. The cookies are great even without the glaze icing but they are extra special with the icing and extra peppermint crunch on top. Chocolate and peppermint are the perfect Christmas time combo which makes this fudgy peppermint cookie perfect for Christmas cookie exchanges!They are festive looking and oh so delicious.
Fudgy Chocolate Peppermint Crunch Cookies
Yeilds: 3 1/2 to 4 dozen cookies
METHOD:1 stick butter
12 ounces semisweet chocolate
1 1/2 cups flour
1/4 cup unsweetened cocoa powder
1 1/2 teaspoons baking powder
1/4 teaspoon salt
1 1/4 cups (packed) brown sugar
3 eggs, at room temperature
1 1/2 teaspoons pure vanilla extract
1 teaspoon espresso powder or coffee extract
1 cup Andes peppermint crunch baking chips

Chocolate Glaze Icing
 2 cups confectioners' sugar
 4 tablespoons unsweetened cocoa powder
 2 tablespoon butter, softened
 1/2 teaspoon vanilla extract
 4 tablespoons milk

METHOD:
For the cookies:
In a medium bowl, whisk together the flour, cocoa powder, baking powder and salt.
Using an electric mixer, beat the sugar, eggs and vanilla at low speed until smooth, 2 minutes. Mix in the cooled chocolate mixture just until blended. With the mixer running, slowly add in the flour mixture. Mixing on low speed until just combined. Refrigerate the dough for at least 1 hour. 
Position a rack in the upper third of the oven; preheat to 325 degrees . Line 2 large cookie sheets with parchment or a silicon baking mat. Using a tablespoon, scoop the dough and roll between your palms to form 1-inch balls. Arrange balls 2 inches apart on each cookie sheet, flattening the tops slightly. Bake until the tops of the cookies crack, about 12 minutes. Don't over bake. You want the cookies to be soft and fudgy!

For the Chocolate Icing:
In a small bowl, combine butter with sugar and cocoa.
Add vanilla. Add milk gradually until smooth.

Just add a glass of milk

Wednesday, December 12, 2012

German Chocolate Cookies

This time of the year is crazy for everyone. I don't have time for a long post but I wanted to get these cookies posted before Christmas. They are a basic sugar cookies filled with German chocolate frosting. If you are looking for a new cookie to add to your Christmas cookie tray, these cookies will not disappoint!
German chocolaty goodness!

German Chocolate Cookies

No-Chill Sugar Cookies
Yield: about 2 dozen 2-in. sandwich cookies

Ingredients:
1 cup (2 sticks) unsalted butter, softened
1 1/2 cups confectioner's sugar
1 egg
1 teaspoons vanilla extract
1/2 teaspoon coconut extract 
2 3/4 cups all-purpose flour
2 teaspoon baking powder
1 teaspoon salt

Method:
Preheat oven to 350ºF.

In large bowl, beat butter and sugar with electric mixer until light and fluffy. Beat in egg and extracts. Mix flour, baking powder and salt; add to butter mixture 1 cup at a time, mixing after each addition. Do not chill dough. Divide dough into 2 balls.
On floured surface, roll each ball into a circle approximately 12 in. diameter x 1/8 in. thick. Using a 2 inch round cutter, cut out as many cookies as possible. Dip cookie cutter in flour before each use. Bake cookies on ungreased cookie sheet 8-11 minutes or until cookies are lightly browned.

German Chocolate Filling
source: Taste of the South Dec 2012

INGREDIENTS:
4 oz semi- sweet chocolate chips
1/2 cup shredded coconut
1/4 cup chopped pecans (optional)
1/3 cup heavy cream
2 Tablespoons unsalted butter
Place chocolate, nuts, and coconut in a small bowl. Set aside. In a small sauce pan butter and cream. Bring to a boil. Remove from heat and pour over the chocolate mixture. Stir until the chocolate is melted. Allow to cool to room temperature.
Put about 1 teaspoon chocolate coconut filling on the flat side of one cookie, and top with another cookie to make a sandwich. Sprinkle the tops of the cookies with confectioners sugar. Can be stored up to one week in an airtight container.


Monday, December 3, 2012

Pepper Jelly Thumbprint Cookies

If you're not from the South, you may not be too familiar with pepper jelly. Pepper jelly is usually made with spicy peppers, such as jalapeno or habanero's. The jelly is the perfect marriage of spicy and sweet. Here in the South we love our pepper jellies. It frequently shows up at parties, poured over cream cheese, served with crackers. I love it. However, I was a little skeptical about this recipe the first time I saw it. I mean I love thumbprint cookies and pepper jelly but I NEVER would have considered putting the two together. Hubs, who puts hot sauce on nearly everything he eats even draws the line at dessert! As soon as I saw this recipe I knew I just had to make these cookies. It sounded like such an unlikely combo that I just couldn't wait to try them. Believe it or not these cookies are really really good. They are a little sweet and buttery with just a just a slight hit of heat at the end. It all just works. It's delicious, I promise! Now I guess hubs can even have spicy for dessert. Okay, that kind of scares me!
Made with green and red pepper jelly these cookies look so festive for the Christmas season. They will make a great addition to your Christmas cookie baking. Trust me they will be a hit at your cookie swap!


Pepper Jelly Thumbprint Cookies
source: BHG.com
yields: about 6 dozen

INGREDIENTS: 
1 cup butter, softened
1 cup packed brown sugar
1/2 teaspoon baking powder
2 egg yolks
1 teaspoon vanilla
2/3 cup yellow cornmeal
2 cups all-purpose flour
1/4 cup red and/or green jalapeno jelly

METHOD:
Preheat oven to 350 degrees F.
In a large mixing bowl, beat butter with a mixer on medium to high speed for about 30 seconds. Add brown sugar and baking powder. Beat until combined, scraping side of bowl occasionally. Beat in egg yolks and vanilla until combined. Mix in cornmeal. Mix in as much of the flour as you can with the mixer. Using a wooden spoon, stir in any remaining flour.
Shape dough into 3/4-inch balls. Place one inch apart on an ungreased cookie sheet. Lightly press  your thumb into the center of each ball of dough. Fill each center with about 1/8-1/4 teaspoon of the jelly.
Bake in the preheated oven about 10-12 minutes or until bottoms are lightly browned. Cool on cookie sheet for a few minutes then transfer cookies to a wire rack to cool.

Friday, December 16, 2011

Red Velvet Cookies


 Red velvet and Christmas are a perfect combo in my world. I mean what could be more perfect for Christmas celebration than a bright red cake topped with a luscious creamy white frosting? It's a decadent treat with colors that are tailor made for the season. I've had the recipe for these cookies dogeared in my copy of Taste of the South magazine since last year. I thought they looked like a perfect Christmas cookie. I'm so glad I finally tried this recipe. They are everything wonderful about red velvet cake, in a cookie. I think that I even like them a little better than red velvet cake. The cookies are rolled in sugar before they are baked which gives the outside just a slight crunch, that's so good. ( I'm not just saying that to sound like Giada ,it really is good, but I'm pretty sure she'd also approve of the slight crunch on the outside.)
 If you like red velvet cake these cookies will not disappoint. Plus they how perfect are they for serving at a holiday party??!

Red Velvet Cookies
Printable Recipe

For the cookies:
1/2 cup unsalted butter, softened
1 1/2 cups sugar, divided
1 large egg
1 teaspoon vanilla extract
1 1/2 cups all-purpose flour
2 tablespoons natural unsweetened cocoa
1/2 teaspoon baking soda
1/4 teaspoon salt
Red gel food coloring

In a large bowl, beat butter and 1 cup sugar at medium speed with an electric mixer. Add egg and vanilla, beating until well blended.
In a separate bowl, combine flour, cocoa, baking soda, and salt.
Add flour mixture 1/2 cup at a time to butter mixture, beating well after each addition. Add desired amount of red gel food coloring, stirring well. Refrigerate for 1 hour.
Preheat oven to 350°. Line 2 baking sheets with parchment paper.
Using your hands, roll dough into 1 1/2-inch balls. Roll balls in remaining 1/2 cup sugar. Place 2 inches apart on prepared baking sheets; flatten slightly with a spatula.
Bake until slightly soft, 7 to 9 minutes. Let cool on baking sheets for 2 minutes. Transfer cookies to wire racks, and let cool completely. Spread cream cheese frosting on flat side of 1 cookie. Top with another cookie, flat side toward filling. Repeat with remaining cookies and filling.

Cream cheese frosting filling:
4 ounces cream cheese, softened
2 tablespoons unsalted butter, softened
2 cups confectioners’ sugar
1/2 teaspoon vanilla extract

In a large bowl, beat cream cheese and butter until creamy. Gradually add confectioners’ sugar, beating well after each addition. Add vanilla, beating well. (I put green gel coloring into half of the cream cheese frosting and left half white.)

Source: Taste of the South, Dec/Jan 2011

Hohoho yeah!

Saturday, December 19, 2009

Merry Decorating


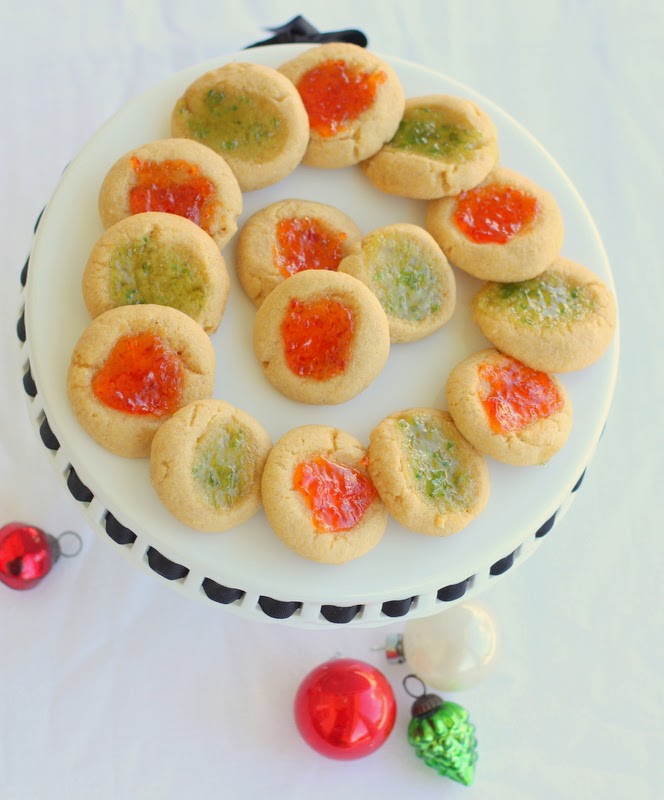
The holiday season is a great excuse to make lots of cookies, which are my personal weakness. I'll turn down a piece of cake, say no thanks to a doughnut, but wave a homemade cookie in my face and I'm all over it! Sugar cookies are pretty high up on my list of favorite cookies. I've posted before about how much I like 
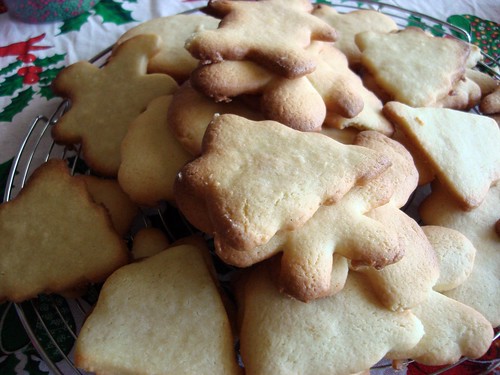
this sugar cookie recipe, but if your looking for a great tasting cookie that really holds its shape when cut-out, then try these cookies. I discovered this recipe a couple of years ago when I hosted my first 
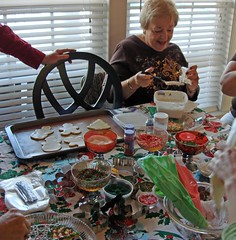
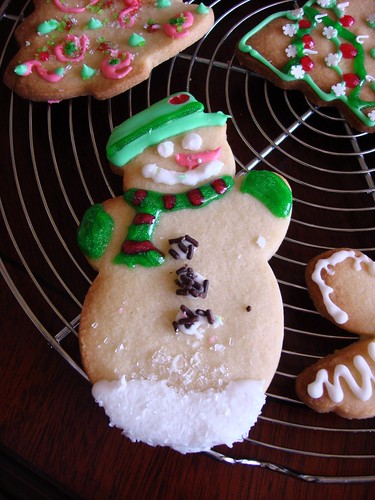
Drop in and Decorate party. These cookies are perfect for making cut out cookies. They maintain their shape and size and don't puff up when baked, so you end up with a nice flat surface to decorate.

Makes 16-20 large cookies; see note below for making multiple batches.
 Printable recipe
3-1/4 cups unbleached all-purpose flour
1-1/2 tsp baking powder
1/2 tsp salt
1-1/4 cups best quality unsalted butter, softened
1 cup sugar
1 large egg
1 Tbsp milk
2-1/2 tsp best quality pure vanilla extract

Preheat oven to 375°F. Line a couple of baking sheets with a Silpat or parchment paper. In a large bowl, stir together flour, baking powder and salt. In another large bowl or the bowl of a heavy-duty stand mixer, beat together the butter and sugar, until fluffy. Add egg, milk and vanilla, and continue to beat until well blended and smooth. Beat flour mixture into the butter mixture until smooth. Divide dough in half. Place one half on a sheet of parchment paper or wax paper; cover with another sheet and roll to 1/4 inch. Repeat with second half of dough. Refrigerate dough for at least 30 minutes, or up to a couple of days (or, if making far in advance, you can freeze at this point. Wrap sheets tightly in plastic wrap). Remove one sheet from the refrigerator; peel off the top wax paper, then replace paper and invert dough. Peel off and discard what is now the top sheet of paper, and cut out the cookies. (cookies will spread, so do not place too close together on the baking sheet). Reroll scraps, refrigerating if necessary to firm the dough.
Bake for 6-9 minutes, or until just lightly colored on top and slightly darker at the edges. Rotate sheets halfway through for even browning. Remove pans from oven and let cookies cool 2-3 minutes. Then remove cookies to a rack and let cool completely. (At this point, the cookies can be stored in an airtight container for up to two weeks, in layers separated by parchment or wax paper.) After the cookies are completely cooled, decorate with Royal Icing. 

*Note: to make multiple batches, do NOT double the recipe. It’s hard to control proportions. Instead, make multiples of the original recipe, one batch at a time, for guaranteed success!

*Another note: Rolled sheets of cookie dough can be made ahead and frozen (or, if you're going to use them within a day or two, you can stack the rolled sheets of dough on a cookie sheet in the refrigerator). Let defrost until dough is pliable enough to be cut without breaking cookies, but not necessarily completely defrosted.


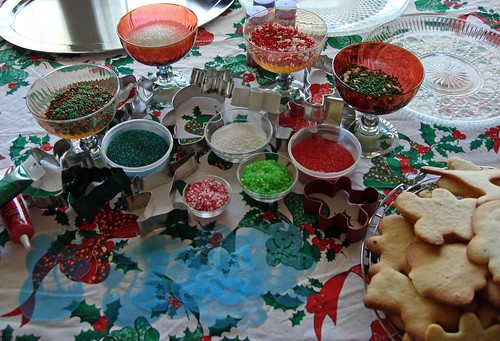
I tried several different recipes for Royal Icing. Some work better than others. It's really all about getting the right balance of water. I've had the best success using this recipe, but still find that with each batch I have to adjust the amount of water slightly. For a step-by-step guide to decorating with Royal Icing, check out this tutorial over at Annie's Eats

Royal Icing
Ingredients:
4 cups powdered sugar, sifted
2 tbsp. meringue powder
5 tbsp. water
Directions:
Combine all ingredients in the bowl of a stand mixer fitted with the paddle attachment.  Mix on low speed until the sheen has disappeared and the icing has a matte appearance (about 7-10 minutes).  Transfer the contents of the mixing bowl to an air-tight container. Add water in small amounts mixing well until desired consistency is reached. Gel icing colors work best for coloring your royal icing. You can use liquid food coloring, but it will change the constancy of your icing, so keep that in mind if you intend to use a liquid food coloring. Keep the royal icing in air tight containers. Do not refrigerate.


 Merry decorating!!


This is also my submission to Food Blogga's 3rd annual Eat Christmas Cookies round up. If you'd like to send in a cookie to be added to the round-up go here. To check out all the cookies sent in so far, go here. 
There are some really mouthwatering looking cookies so be sure to check them out!!


Sunday, December 21, 2008

Snickerdoodles and giveaway winners!


Snickerdoodles have always been one of my all-time favorite cookies. My mom made these all the time when I was growing up. I remember being thrilled when I opened my lunch box and in it was two snickerdoodles, wrapped in waxed paper. At that point I didn't care what else I had for lunch!
There are two different methods for making snickerdoodles. One that uses cream of tartar and one that uses baking powder. I've tried both ways and I know that baking powder has cream of tartar in it, but the cookies just don't taste quite the same. The cream of tartar lends a bit of tang to the cookies and also helps with the texture of the cookie. I also prefer the all butter recipe over the part shortening part butter recipes.
In my opinion snickerdoodles way better than your average sugar cookie. The top of a snickerdoodle is crackled and crisp but the inside is soft. Perfect cookie texture! For some reason though I haven't made them in a long time. They are an old fashioned cookie and I guess because I love trying new recipes, I just neglected to make snickerdoodles for a while. I recently renewed my love affair with this cookie and will be make anther batch before Christmas. I thought this would be the perfect cookie to submit to the Eat Christmas Cookies Season 2 round-up hosted by Susan of Food Blogga


From Joy of Cooking

Makes about 36 3" cookies

Preheat the oven to 350 degrees. Grease or line 2 cookie sheets.
Whisk until well blended
2 cups all-purpose flour
2 teaspoons cream of tartar
1 teaspoon baking soda
1/4 teaspoon salt

Beat in a large bowl
1 cup (2 sticks)unsalted butter, softened
1 1/2 cups sugar

Add and beat until well combined
2 large eggs

Stir in the flour mixture.

In another bowl combine
1/4 cup sugar
4 teaspoons ground cinnamon

Shape the dough into 1 1/4-inch balls, roll in the cinnamon sugar, and arrange about 2 3/4 inches apart on the cookie sheets. Bake until the cookies are light golden brown and the edges, 12 to 14 minutes. Let stand briefly, then remove to a rack to cool.

And now for the winner's of the Silver Bells book giveaway!! I drew numbers and the winners are...Pam of For the Love of Cooking and Cathy of Noble Pig. Congrats!! Just email me your mailing address to paulahennig(at)msn(dot)com and I'll get your book in the mail. Thanks to everyone for all your great comments!

Thursday, December 20, 2007

A Christmas cookie by any other name...


For many, me especially, memories and traditions of Christmas are tied to cookies. Which cookie is as diverse as the people themselves. Growing up always had a variety of different cookies every year. Sugar cookies, thumbprint cookies, chocolate kiss cookies, and several others would be included in our Christmas tradition. For me however, Russian Tea Cakes were always my favorite. It was the only time of the year that we made them. They're rich, buttery with a little crunch from the nuts, and just the perfect bite size. They even look like Christmas, like little snowballs. Which is another one of the several names this cookie goes by. They're also known as Mexican wedding cakes, snowdrops, southern pecan butterball, Italian nut cookie and I think there are a few more out there. It seems almost every culture has a version of this melt in your mouth shortbread nut cookie. Historically, this cookie has been a reserved for celebrations;weddings, christenings, and for many including my family, Christmas.
This is a simple cookie to make, with only a few ingredients. Because there are so few ingredients in the cookie, using high quality butter and vanilla extract are the secret to making this cookie great. My favorite part of making this cookie is rolling them in the powdered sugar after they come out of the oven. When you drop them into the sugar is tricky part. Too soon and the sugar melts and you burn your fingertips, too late the cookie cools the sugar doesn't stick well. These are all part of my memories of making this Christmas cookie. Oh and you can't eat just one. They're just begging to be popped into your mouth.

Method
1 cup butter, softened
1/2 cup powdered sugar
1 teaspoon vanilla
2 1/4 cups all-purpose flour
3/4 cup finely chopped nuts ( I always use pecans, but you can use almost any nut you have on hand.)
1/4 teaspoon salt
Powdered sugar


1. Heat oven to 400ºF.
2. Mix butter, 1/2 cup powdered sugar and the vanilla in large bowl. Stir in flour, nuts and salt until dough holds together.
3. Shape dough into 1-inch balls. Place about 1 inch apart on ungreased cookie sheet.
4. Bake 10 to 12 minutes or until set but not brown. Remove from cookie sheet. Cool slightly on wire rack.
5. Roll warm cookies in powdered sugar; cool on wire rack. Roll in powdered sugar again


This is my entry for the Eat Christmas Cookies event hosted by Food Blogga. Drop by and check out all the other great cookies from around the world!!

Friday, December 14, 2007

Drop in and Decorate


I love making Christmas cookies. I usually make several different kinds over the Christmas season and end up eating way too many and giving them away to family and friends. Which I'm sure is greatly appreciated, but this year I came across the Drop in and Decorate cookies for donation, started by Nine Cooks. King Arthur Flour joined in and made up a kit you can use with everything needed to throw your own party. What a great idea! Bake cookies have your friends come by and decorate them, and then donate the cookies to charity! Not only is it a really fun excuse to have a party but you get to do something nice for others as well.

My next door neighbor works for a Senior Center. She was thrilled with the idea and took all the finished cookies to distrubute among the residents at the facility.
I invited everyone to drop in on Sunday from 2-5 p.m. What a party we had! At first some people were a little intimidated by the pastry bags filled with Royal icing. However, once they gave it a try, they were ready to decorate everything in sight!


We decorated dozens of sugar cookies and put them into cellophane bags tied with ribbons. They were adorable when finished and it was a wonderful feeling knowing the smile they'd bring to someone else this holiday season.

I decided to have the party a little too late to order the King Arthur kit, but Nine Cooks has all the recipes and ideas on their site. The cookie recipe is very tasty and rolls out easily. I also made a batch of sugar cookies from another recipe and although very tasty it was MUCH more difficult to roll and cut out.
So invite your friends and family to come over and have your own Drop in and Decorate party. It will fun stress-free party that will bring a little Christmas joy to others!

We had a couple artistic decorators!
What's for lunch honey? is hosting this month's Monthly Mingle, so drop by and check out all the other Drop in and Decorate parties going on!