Showing posts with label halloween. Show all posts

Monday, September 30, 2013

Halloween PEEPS S'mores Trifle


My mail, probably yours as well, consists of bills, junk, a few magazines, more junk, maybe something I ordered, and more bills. Every once in a while something unexpected and fun comes along with the usual daily mail. It's the hope that there might be something fun and exciting in the day's mail that makes me keep an eye out for the mail delivery truck. A couple of days ago I received a box full of Halloween PEEPS in the mail. Now that's what I call fun mail! The nice folks at PEEPS sent me a few of their Halloween themed PEEPS to try. Thanks PEEPS!
In case, if you didn't already know, PEEPS are not just for Easter anymore. Nope they've gone multi-holiday! There are now Halloween and Christmas PEEPS, in addition to the traditional Easter PEEP. No more waiting and entire year for PEEPS to return! 
Anyway, I wanted to use my PEEPS in a fun Halloween-ish dessert. With PEEPS being super fun marshmallow treat, I immediately thought of doing s'mores. PEEPS and s'mores, are a perfect match, but I didn't want to melt my  PEEPS, I mean look at how cute they are! So I decided to layer the PEEPS in a s'mores trifle. How cute and yummy is that? PEEPS, chocolate, whipped cream...Happy Halloween!


Tuesday, October 23, 2012

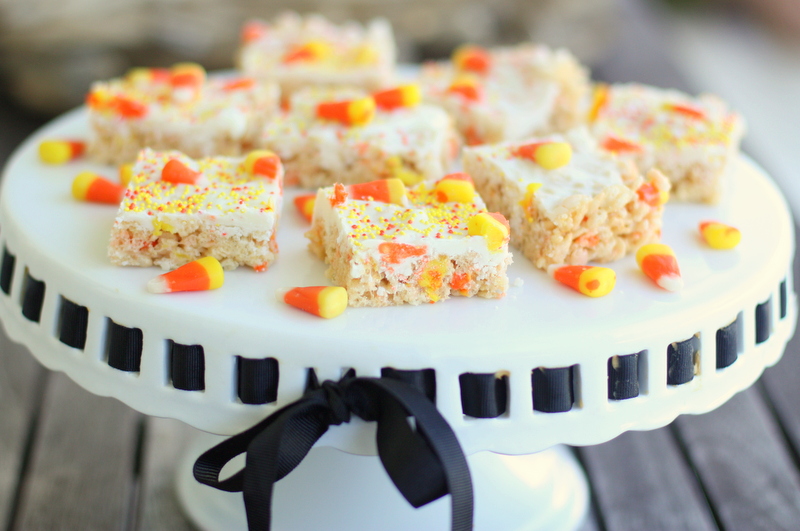
Candy Corn Rice Crispy Treats

Where has this month gone! With just a little over a week until Halloween,I thought I'd share this idea for candy corn rice crispy treats. These festive treats are perfect for Halloween parties, bake sales, etc... To make them extra special, I topped the rice crispy treats with white chocolate and added some orange and yellow sprinkles and candy corn. Super cuteness! And they taste great too.


Candy Corn Rice Crispy Treats


INGREDIENTS: 
4 tablespoons butter
1 (10 ounce) bag marshmallows
1/4 teaspoon salt
1 teaspoon vanilla
6 cups Crispy Rice Cereal
1 cup rough chopped candy corns
1 bag white chocolate candy melts (12 ounces)
METHOD:
Spray a 13x9 baking dish and rubber spatula with non stick spray. Place white chocolate candy melts in a bowl. Follow the manufactures instructions for melting the white chocolate. Set aside and make the rice crispy treats.
In a medium sized sauce pan over low heat, add butter and let it melt. Once melted add marshmallows, salt, and vanilla. Stir until the marshmallows have melted completely and have reached a smooth consistency. Remove from heat and fold in the cereal and candy corns until completely coated. Add the mixture to the greased baking dish and smooth out evenly. 
Spoon the melted white chocolate onto the rice crispy treats. Using the back of a spoon or an off-set spatula, spread the melted white chocolate evenly over the top of the rice crispy treats. Immediately add sprinkles and decorate the top with whole candy corns, if desired.. Allow to cool before cutting into squares.
What is it about candy corn that makes them just so darn cute?

Tuesday, October 4, 2011

Halloween Wreath


I realize that no baking is involved with this post. However since this blog is my little corner of the internet and I do occasionally do more than bake, I thought I share this little Halloween project I did this week. I have to start by saying that I am not a crafty person. Not. At. All. I don't have the patients for things like scrap booking or sewing. Which is kind of strange since I have no problem working on a cake for hours at a time or decorating dozens of cupcakes. 
 I blame my decision to do this little project totally on Pinetrest. I have seen so many cute crafty things posted there that I began to feel like a loser for not even owning a glue gun. When I came across this wreath, I thought it was adorable. It looked pretty easy so I thought I'd try my hand at making one. I didn't want to spend much on the supplies because I wasn't sure if I'd be able to make a wreath I actually wanted to hang! This wreath not only looked fairly easy to make but the supplies were inexpensive as well. I think all total (including purchasing a tiny glue gun for $3.00) I spent under $15.00 to buy everything I used to make it. 
This project is definitely on the easy side. Pretty much the only skill you need is knowing how to tie a knot. Perfect for the craft challenged person, such as I. 
I really like how the wreath turned but next time would do a sturdier base for my wreath. Because was trying not to spend too much and bases can cost as much as $10.00, I bought a foam piece from Lowes for .97 cents and cut it to the size I wanted. I saw this idea on Pintrest and thought I'd give it a try. It was okay but was definitely not as sturdy as a foam base would have been. I also thought it was a bit too narrow. I liked that it was black so I didn't have to worry about it showing through the tulle. However if you make this wreath I would recommend using a different wreath for the base. One like this or this would work better. 

Supplies:

1 base for wreath between 12 and 14 inchs
2  25yard spools of black tulle ( I found them at Wal-mart the amount you need will depend on how large around your base is. I used 2  25yard spools.)
1 yard large rick-rack (also found at Wal-mart. Hancock Fabrics carries it as well)
2 yards of wide orange ribbon for bow and to hang the wreath (again Wal-mart)
Decorations of your choice. (I found mine at Hobby Lobby for 30% off so they cost me less then $2.00 total.)

How To:

Cut your tulle into about 16 inch lengths. I measured out 16" on my table and marked it with two pieces of painters tape. This way I could just unroll and cut between the marks and not have to measure out each piece.


Next tie the tulle around the wreath and knot it in a basic knot. Like if you were tying you shoe laces in a knot: right over left, left over right. Continue to tie the strip all the way around the wreath. Try to keep the knots lined up. As you tie the strips, push them tightly together so that there are no gaps. The more piece of tulle you put, the fuller your finished wreath will look.


Hot glue your rick-rack around the edge where the knots are. Can I just tell you how much I love this orange rick-rack!
My lack of glue gun experience can be seen where I got some on the tulle!
 Now your ready to add the fun stuff. This is where you can be creative and do whatever you want. I made a bow using 2"wide orange ribbon and hot glued a tiny spider in the center. I like the way the ribbon bow came out but wired ribbon would have probably been easier for a novice at bow making. I glued the bow and the Beware sign to lower right side of the wreath


I looped a piece of the orange ribbon around the wreath and hung the Trick-Treat sign from the ribbon. How long your ribbon needs to be depends on how far down on the door you want the wreath to hang.

I had fun making this wreath. Watch out, I have a glue gun now. Who knows whats next!!

Not too bad for a first time wreath maker.

Monday, September 26, 2011

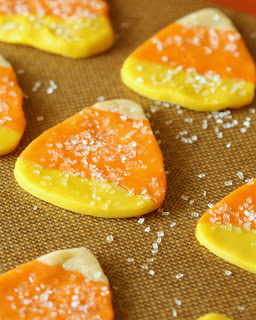
Candy Corn Sugar Cookies


Hubs tells me all the time that I like to do things the hard way. He says this when I choose to make something rather than buy it or make do with what I have rather than buy something new. Even if that something new would make my life easier. Usually it's because I'm being cheap thrifty. However sometimes it's because I get an idea and just want to see if it will work. That's how these cookies came about. I was wasting time doing important research on Pinterest. In the interest of public safety, I feel I must warn those that don't already know about Pinterest. I'm not sure what happens, maybe a quantum time leap, or perhaps it's in its own time zone or something. All I know is that when you visit Pinterest, what feels like 5 minutes in Pinterest time is actually an hour in real time. Consider yourselves warned! Anyhooo, back to the cookies, so I saw some cute candy corn shaped sugar cookies while surfing around Pinterest. I liked that they looked like candy corn but didn't have to be decorated. They looked easy, a departure from my usual way of doing things. This was a week or two ago and I didn't pin the picture, which I realize kind of defeats the purpose of Pinterest. I couldn't find the picture again so I decided I'd just wing it and see if I could make some cookies like the ones I had seen. I have since seen other ways to make candy corn cookies but I like how these came out and they really are easy to make.

These are perfect for when you need a fun Fall/Halloween dessert, like school parties. You could go super easy and use store bought sugar cookie dough to make these cookies. No judgement here! However this recipe for sugar cookies is simple to make and tastes delicious. The dough doesn't need to be chilled before using, so it's quick to make as well.

Easy No-Chill Sugar Cookies
Source: Food.com submitted by Chef.Jules
Ingredients:
1 cup unsalted butter
1 1/2 cups granulated sugar
1 egg
2 teaspoons vanilla
2 3/4 cups all-purpose flour
2 teaspoons baking powder
1 teaspoon salt

orange and yellow gel food coloring
candy corn cookie cutter (or you could cut out triangles)

Method:
Preheat oven to 400 degrees.
In mixing bowl, cream butter with sugar until light and fluffy. Beat in egg and vanilla.
Mix flour, baking powder, and salt in a separate bowl; add to butter mixture 1 cup at a time, mixing after each addition. Divide dough into two balls.

To make Candy Corn Cookies:
Divide your cookie dough into three equal pieces. Knead orange gel food coloring into one piece and yellow into another. Leave the third piece white. Roll the dough into logs about 1 inch wide and 6-8 inches long. Put each of the logs side-by-side and slightly push them together like in the picture below.


Roll the cookie dough out approximately 12" wide and about 1/8" thick and cut out with a candy corn shaped cookie cutter. If you don't have a candy corn cutter you can just cut out triangles.
Kind of has a 70's vibe going!


I sprinkled some with sanding sugar and left some plain.
Bake on ungreased cookie sheet for 6 - 7 minutes or until cookies are lightly browned. I line my pans with parchment paper or a silpat for easy cookie removal.


I didn't waste the leftover pieces of cookie dough. I gathered them all together, added more orange gel coloring, rolled out the dough again and cut out pumpkins.


I got a little over a dozen candy corn cookies. I made small and large pumpkins and had a dozen pumpkin cookies when I was done.

Saturday, October 30, 2010

Happy Halloween


Somehow this month has gotten away from me. With Hubs in Iraq, I've had somewhat of a bah humbugish attitude about Halloween this year. So here it is the day before Halloween and I've yet to bake anything remotely Halloweenie (ha Halloweenie now that's just asking for comments!) So since I didn't do any Halloween baking I thought I'd round-up a few of the coolest things I've seen out there in the blogshpere and share them with you.

These little meringue ghosts are from Dulcis in Furno's blog and are some of the most adorable ghosts I've ever seen! 
Meringue Ghosts


This cute and clever pumpkin cake come from Taste and Tell. It's decorated with Trix cereal!! How unique.


If your looking for something goulish this Halloween, these Lady's Finger's from Martha Stewart will fit the bill!

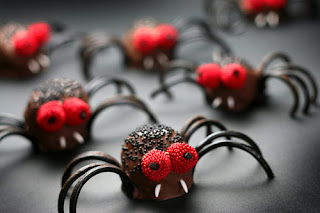
Spider Bites!
Or if creepy crawly things are what you want, check out these spiders by Bakerella.

There are so many more amazing, creepy, wonderful Halloween treats out there but these are a few of my favorites! I hope they inspire you to get baking this Halloween.